

HOTA D6 PRO Dual Channel Smart Charger
Recently, I have got the HOTA D6 PRO Smart Charger for a review. This one was kindly provided to me by BangGood.
Is is also known as Hobbymate D6 PRO and Makerfire D6 PRO. These models are exactly the same, they are just rebranded by different manufacturers.
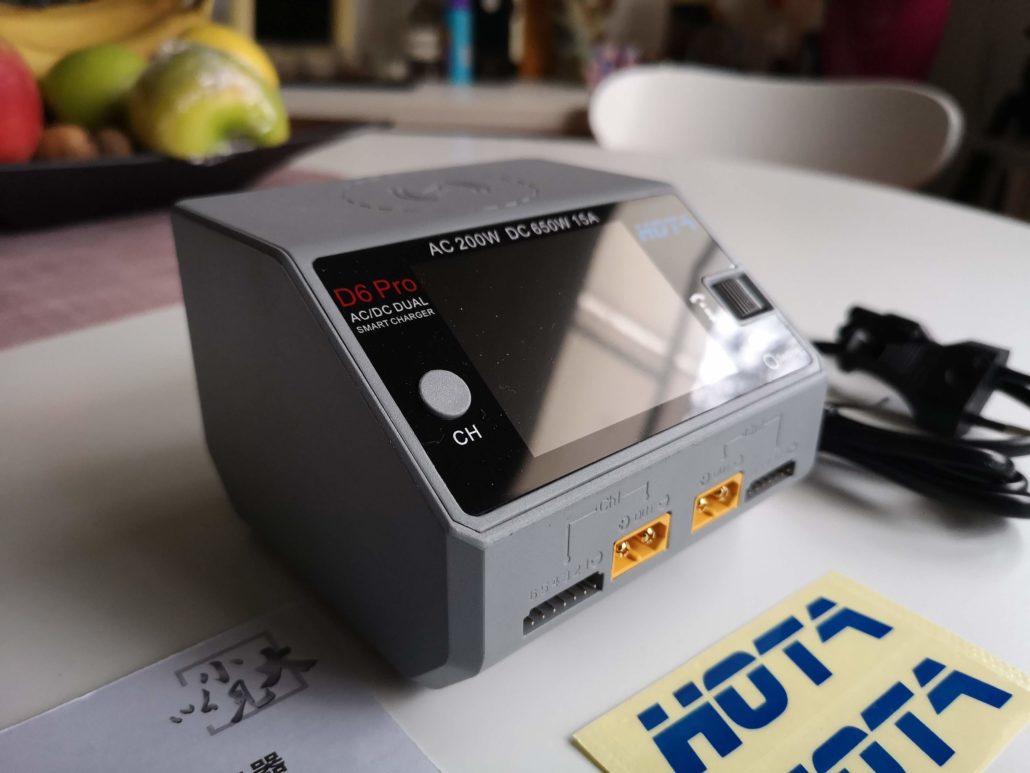
One of the main features of this charger is that it both DC and AC. What this means is that you will be able to use it at home by plugging it into the mains via the AC port and also take it to the field and charge your batteries by using a bigger, beefier battery plugged into the DC port of the charger.
The AC charging is rated for up to 200W altogether for both channels which means up to 5A per channel on regular 4S pack.
The DC charging is different story and it could charge up to 15A on each channel for a regular 4S battery pack when the input voltage is from 19-25V.
The HOTA D6 PRO looks very similar to the ISDT D2 with some added features and functionalities and also a bit more powerful 15 Amps per channel instead of 12 which could be really handy when charging multiple batteries with a parallel charging board.
One of the most differentiating features is that the HOTA D6 PRO features a 5W output wireless charger on the top for devices that support it.
The front side of the charger has one button, display and roller wheel used for going through the menus.
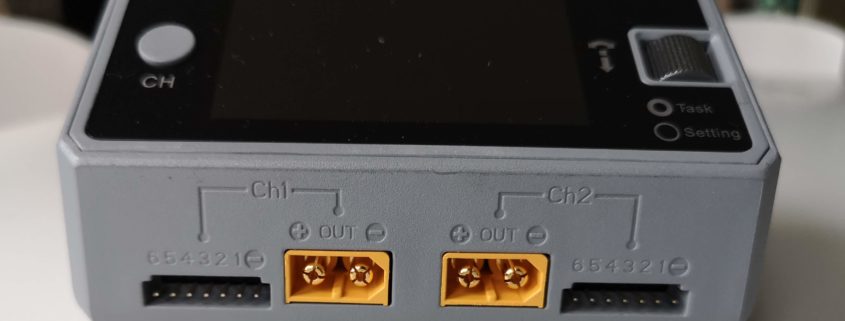
There are two channels in front of the charger both with XT60 output connectors and up to 6S balance leads.
I have noticed that when trying to plug in and charge a battery the balance connectors are flipped so the negative wire is on the right side in contrast to the ISDT chargers which I normally use.
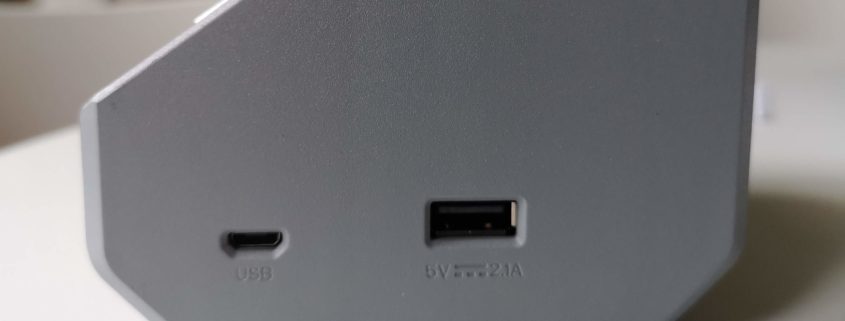
On the right side of the charger there are two usb ports, the smaller micro usb one is for doing firmware updates and the bigger one is used for charging or powering usb devices up to 2.1 Amps
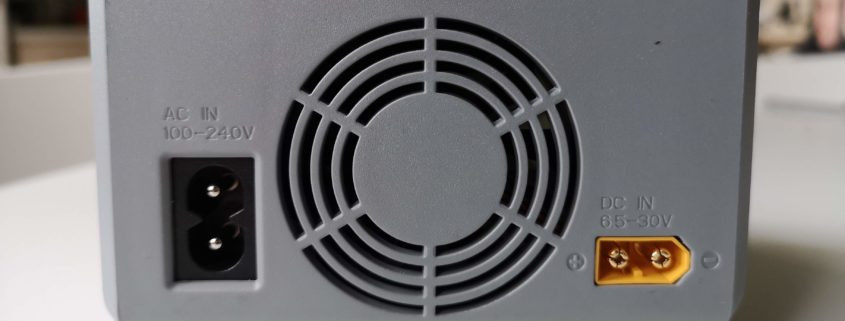
There are two inputs on the back side, one AC from 100-240 Volts and the other one DC is in the form of a XT60 connector 6.5 to 30 Volts.
What’s in the box?
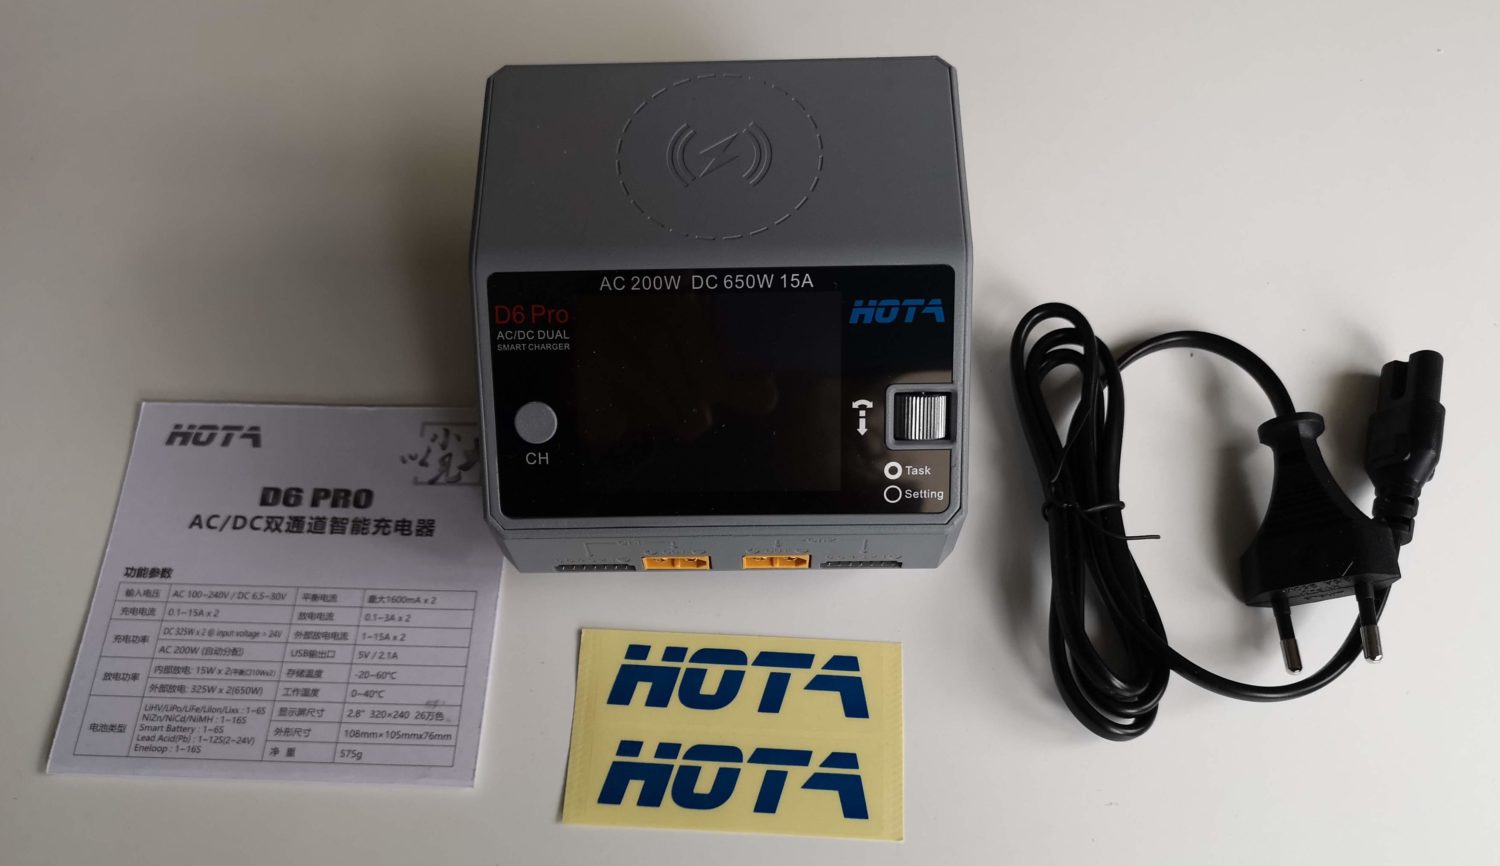
The package includes
- The charger itself
- A small leaflet containing the specifications overview of the charger and a quick start guide
- Power cord for plugging your charger into the AC. In my case the EU version which is stated on the box.
- Set of HOTA stickers
The Interface
The interface looks very similar to the one of the ISDT chargers, so if you are used to that one you will feel familiar when using the HOTA D6 PRO charger.
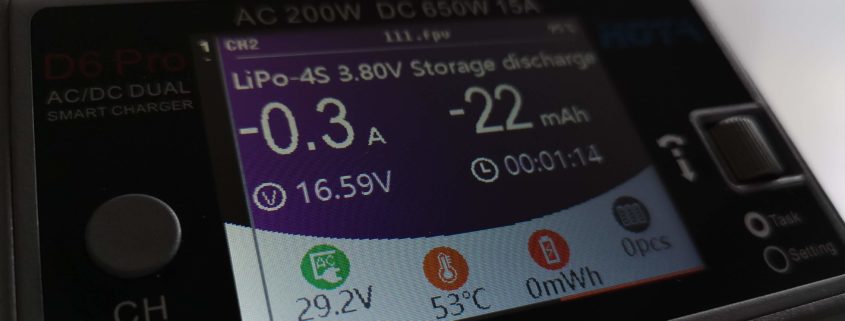
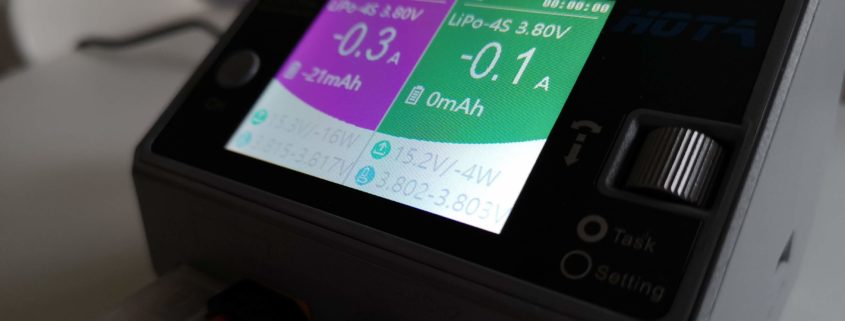
The first screen that appears after the charger boots up and does a self check is the Standby screen, displaying both channels and the input voltage on the bottom of each one.
When you plug in a battery the overall voltage will be displayed under the “Standby…” title and the cell voltage range will be displayed in the bottom of the screen.
This is a two channel charger, so in order to set it up for a charge you first need to select the channel by pressing the “CH” button on the left side of the screen. This will cycle through the first and second channel and show information about both of them at the end.
After selecting a channel, the charger displays more specific info for the selected channel and even more could be seen by rolling the wheel on the right side of the charger. Info such as the internal temperature, entered mWh input voltage and also the internal battery resistance could be read while charging a battery.
By pressing the roller wheel on the right side we enter the specific channel task settings.
The available options are
- Task type (Charge, Discharge, Ext. discharge, Storage and Balance)
- Battery type (11 choices available. Also some exotic choices like Smart battery and Eneloop)
- Cell voltage (For LiPo the available voltage ranges from 4.00 volts to 4.25 volts)
- Cell count (usually automatically populated when you plug in the balance lead)
- Charge current setting
The two out of the ordinary charger features here are Ext. discharge and Balance task types.
The first one is used to discharge your battery when not in use by charging the one that is plugged in to the DC port so you are saving a bit of energy instead of dissipating it as heat.
The second one enables you to equally charge your battery cells to a specific voltage with up to 1.6 Amps of balance charge.
After setting up everything there is a “Start task” option available on the bottom of the Channel task screen which enables you to start charging the battery.
The charger specific settings menu could be entered by pressing and holding the roller wheel.
The available options on the charger setting menu are:
- Task parameters (safety timer, max capacity, end current and trickle charge)
- System parameters
- CH1 Calibration (requires you to enter code to unlock the calibration)
- CH2 calibration (requires you to enter code to unlock the calibration)
- System self checking
- Restore factory settings
- System info
Conclusion
If you want a compact charger that could be powered from both AC and DC then you should consider the HOTA D6 PRO. You can buy it for $97.99 by using the coupon code BGYHA0001 here
The built in power supply is a big plus. Please note that it is a bit limited in power (10 Amps for both channels)
If you already have a power supply and want to buy a dual channel charger, you could check the old and proven ISDT D2 which as I have mentioned is very similar to the HOTA D6 PRO minus the AC capability and the wireless charger.
And if you want something affordable with similar functionality, then you should consider the ToolkitRC M6 DC 150W 10A charger that I will be reviewing soon which retails for around $24, but please note that this is a single channel charger.


Leave a Reply
Want to join the discussion?Feel free to contribute!