

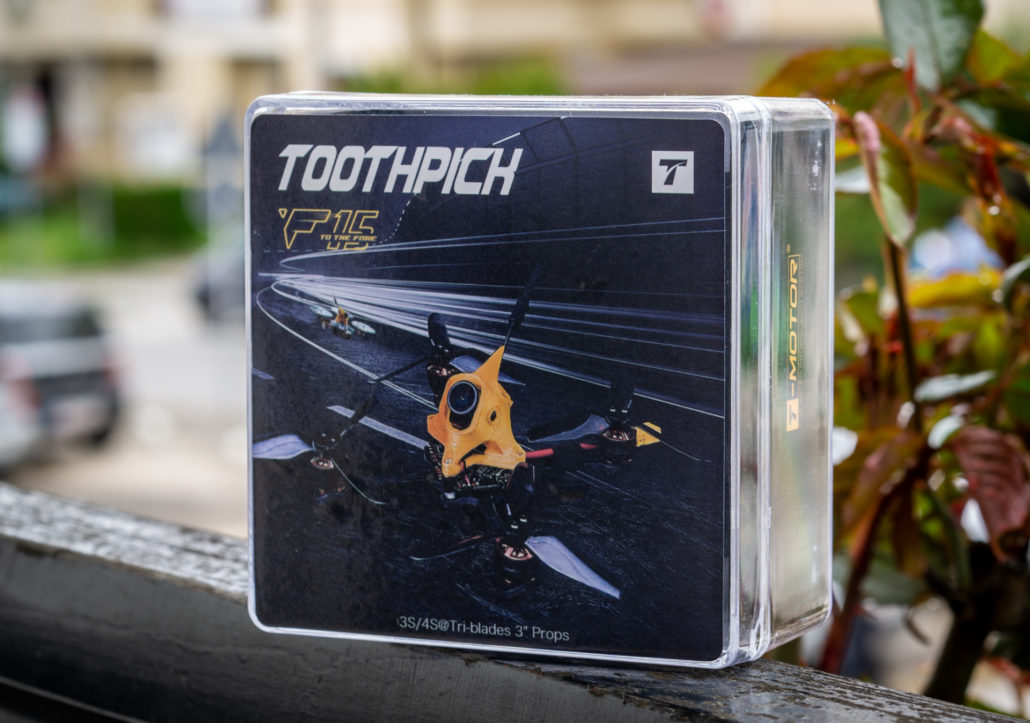
T-Motor Toothpick F15

The T-Motor F15 Toothpick is T-Motor’s take on the toothpick scene. It seems that they just love jumping on the RTF drone hypetrain whenever they have a chance.
T-motor F15 Toothpick has all toothpick specifics starting from the TPU canopy, 3mm unibody true X frame, AIO Flight controller with integrated 4in1 ESCs , 110X motors with borderline high enough KV and 66-ish grams weight.
The first thing that I have noticed when I got the package is how small the box is. The package includes the drone, one battery strap, battery mat, 470 mF 25V capacitor and two sets of propellers.
Components
Frame and canopy
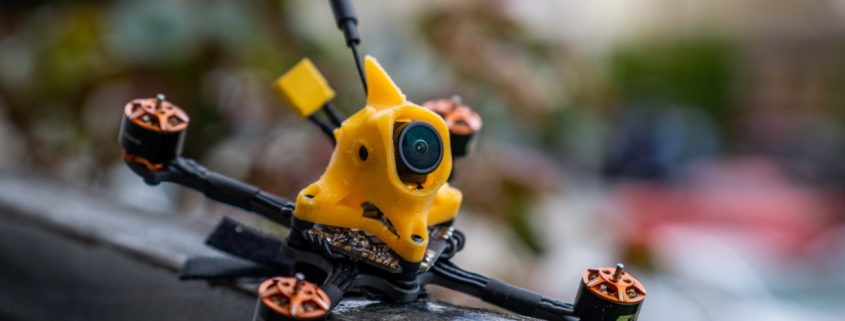
The unibody frame is made of 3mm carbon with true X configuration.
The motor to motor diagonal distance is 110mm
The arms are relatively skinny but the frame is very stiff and it holds on crashes pretty well.
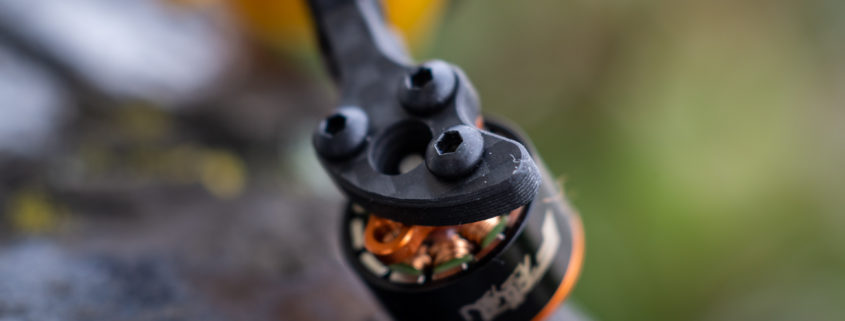
One thing that bothers me a bit about this frame is the lack of motor protection. It would have been much better if T-Motor had elongated the motor protection part for 3-5 millimeters.
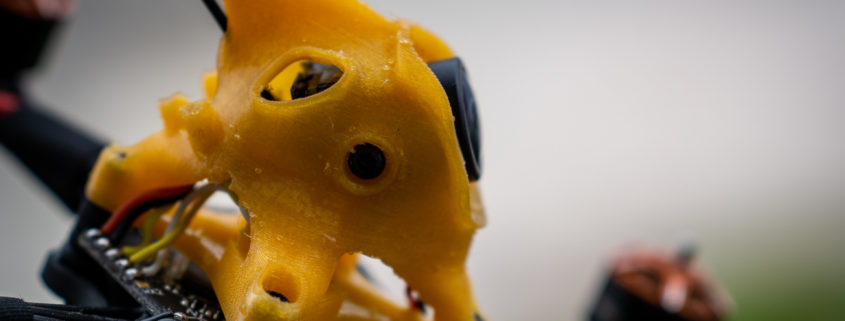
The canopy is 3D printed out of TPU and it is a proven recipe for toothpicks like this. I have gone through plenty of crashes with my Diatone Cube GTB 339 without any issues.
One neat feature is that T-Motor are using press nuts in order to screw in the canopy to the frame. Which is much better than having any kind of bolts or screw head pressing on your battery.
Motors & Propellers

T-Motor have decided to use their F15 4500KV motors capable of supporting 3 and 4S. These are 1106 motors. It is unusual to see such motors on the toothpick, they provide a bit more top end speed, but the flight time is a bit shorter than I’m used to, so these motors are not so efficient and the KV is on the lower side since they are intended to be used on 3 and 4S.
Also the lower end of the throttle does not provide the “in control” feeling and it seems hard to modulate it until you get used to it. This is typical for other toothpick models too but it is more pronounced on this one.

I’m not sure why T-Motor had deviated from the proven recipe to use 1105 motors with 5500KV as the other manufacturers. Hopefully there will be another release with better suited motors like 1105, 1204 or even use their 1303 motors.
The T-Motor Toothpick comes with one set of two bladed HQProp T3020 and another set of three bladed HQProp T3025.
I have tested it with both prop sets and I think that the tri bladed are much better suited for 3S battery having in mind the lower KV of the motors.
AIO Flight Controller and 4in1 ESC
T-Motor have used the Nameless RC AIO flight controller based on MatekF411. This is one big plus if you plan to use this drone with the FlightOne FalcoX firmware, which I have tested and you can read more about that on the bottom of this article.
The ESC is capable of providing up to 12 Amps of power per motor which is usual for this kind of drone.
It is recommended that you use the provided capacitor if you plan to fly with a 4S battery pack.
Video transmitter and fpv camera
The uncluded FPV camera is Runcam Nano 2. I would have expected Nano 3 by now but Nano 2 is OK.
The Nano 2 is 700TVL CMOS camera with ⅓” sensor size 2.1mm M8 lens and 155 degree field of view. The working voltage is from 3 to 5.5 volts.
The included VTx is Nameless RC Nano 400, 48Ch video transmitter that uses IRC Trump protocol with IPEX antenna connector.
The output power could be selected through your flight controller OSD, since this video transmitter only supports RX. There are 5 modes available PIT/25/100/200/400mW.
The video transmitter comes locked from the factory so certain frequencies are not available out of the box. In order to unlock it you should enable PIT mode in BetaFlight on a certain switch and enter PIT mode for three times within 30 seconds after powering. To confirm that you have successfully unlocked the VTx the three LEDs will flash one after another. You should cycle the power after the unlocking procedure.
Adding your receiver and basic configuration
In order to add the receiver you will have to first unscrew the canopy and solder the receiver wires to the exposed pads on the right front side of the drone. The pads are labeled so you will not have any issues soldering them on the right positions. One notice is that if your receiver has an inverted sbus such as XM+, RXSR etc. you will have to solder your sbus wire on the “IN Rc” pad.
It would have been great if T-Motor had provided pre-soldered wires for the receiver to make things easier for the end user similar to other manufacturers such as Diatone and Eachine.
The flight controller comes preflashed and preconfigured with BetaFlight 4.1.0 and the only things that you will need to set up is add the modes and enable the motor beeping since there is no dedicated beeper. This will help you find your drone easier in case of a crash.
Flight performance

The flight performance is on pair with all other toothpick based builds that I have tested so far. Motors are noticeably more powerful than the ones on the Eachine Twig and this is particularly noticeable in the upper range of the throttle which is normal because of the taller stator.
Also I have struggled with the lower end of the throttle during my first pack and I have to pay more attention to throttle control than I usually do.
The flight time is a bit shorter than on the other toothpicks which is expected.
Pros & Cons
- Excellent quality of the components.
- Light build, around 67 grams which provides extra long flight time.
- The video quality from the camera is very decent.
- Good value for the money.
- Battery strap could be better.
- Properly secure the vtx antenna
- The amp draw seems a bit too excessive and it needs to be adjusted.
Flashing it with FlightOne FalcoX
Since the flight controller is based on Matek F411 which is supported by FlightOne as a target for the FalcoX firmware I was eager to try the flight performance of FalcoX on a non FlightOne branded flight controller.
The procedure is relatively simple.
- First you should download and install the latest version of the FlightOne configurator and run it. Next you should connect your drone to your computer.
- After the flight controller is successfully recognised by the configurator, it displays the flight controller serial number.
- Visit the FlightOne store and search for the FalcoX Matek f411 License
- Add it to your cart and proceed to checkout, fill in your serial number near the and under the “Notes” text field. The price for one license is $15 which is worth considering the gain in flight performance.
- After the payment you will be contacted via email as soon as your serial number is added to the database.
- When this is completed, you will be able to install and flash the FalcoX firmware.
The setup procedure after the last step is self explanatory. For the fellow pilots that have no prior experience with FalcoX, there is an automated setup that is visible either on the OSD or on the configurator screen.
Before trying the FalcoX, I intentionally flew a few packs on BetaFlight in order to feel the changes in flight performance. The first thing that I have noticed is that the throttle control is much better in the lower end, not sure if this is due some kind of throttle expo or that is built into the code and the other thing is the famous FalcoX “locked in” or “in control” feeling even on the default settings, which I didn’t notice under the default BetaFlight firmware.
Conclusion
If you are planning on buying your first toothpick drone this one should be in your consideration list. I would also look for the Diatone Cube GTB 339 and if you want something cheap then you should try the Eachine Twig


Leave a Reply
Want to join the discussion?Feel free to contribute!