

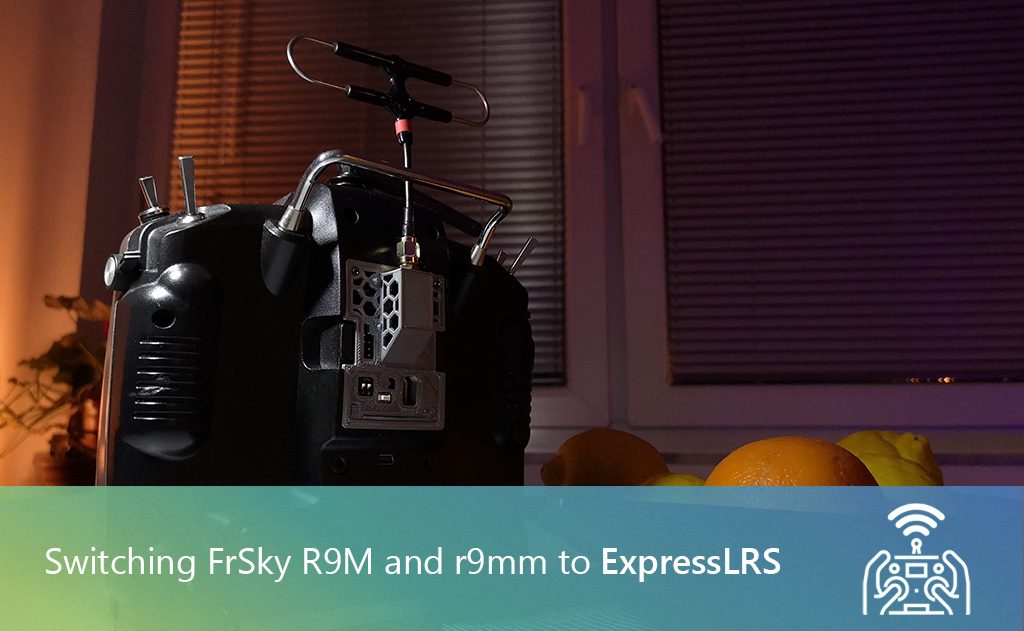
Switching FrSky R9M and r9mm to ExpressLRS – Step by step tutorial
These last two days I have been fiddling with ExpressLRS on R9M. It seemed to me like some kind of marathon, frantically updating the Taranis, R9M transmitter module, and all receivers in my models.
It all started a few days ago when I came across a video by Nick Burns regarding the new HappyModel ES915RX receiver & ES915TX transmitter module working on ExpressLRS protocol. The module and the receiver are priced around $53 for the module and one receiver along with antennas.
You may say, hey but that’s old news, the ExpressLRS is already a year and a half old project 🙂
You are right but this is the first time one of the Chinese companies got interested in developing their own products based on the ExpressLRS protocol which means others will follow and we will have cheaply available receivers and transmitter modules in a very short time.
What is ExpressLRS?
In short, it is an open-source high-performance LoRa Radio remote control link that offers an extremely long-range RC link, faster than Crossfire that could be can be flashed into existing Frsky R9M hardware (RX and TX), Jumper R900 RXs, GHOST ATTO/ZEPTO Receivers, or Custom PCBs.
You can read more here
The bricked receiver
I own an R9M 2018 module with several receivers for the past three years and I have no complaints about the system’s performance.
In the past few years, there has been plenty of development on the FrSky R9M side, the new 2019 module was out, they have introduced the ACCESS protocol and stopped the support for the old ACCST protocol. You can read more about this development here: The Complicated Mess of FrSky ACCESS and FrSky R9
What this meant for me was that I would not receive any further firmware updates for the older there was not going to be further firmware development for any modules and receivers using the ACCST protocol.
I was interested in ExpressLRS but there is always “what if”, most of my models are based on R9, so if something goes wrong I may not be able to fly until I replace the broken parts.
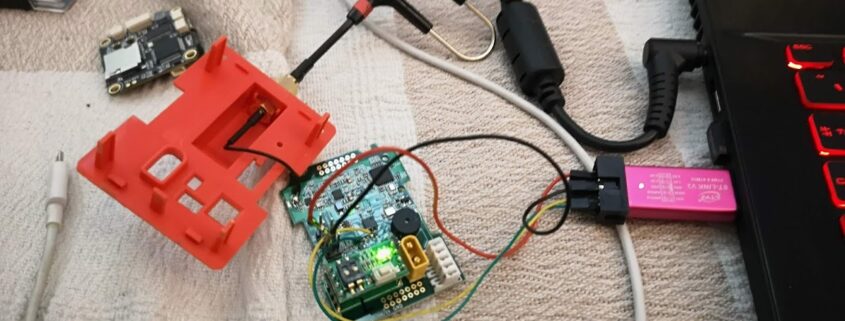
Speaking of broken parts and knowing that r9mm and r9 mini may be flashed with the ExpressLRS firmware via ST-link, I have decided to try the ST-link method on a bricked r9mm receiver that stopped responding after a firmware update that I have left for broken after several unsuccessful repair attempts.
Flashing the r9mm with ST-LINK
Please note that I have gone through the ST-Link route since there was no other way for me to flash the bricked receiver, for regular receivers, you should consider going the Betaflight passthrough method explained in the wiki here
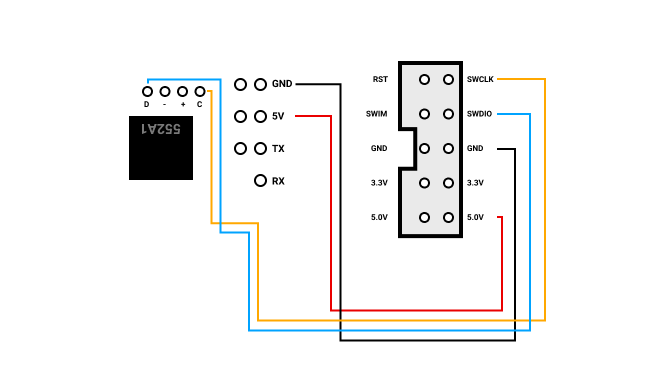
In order to flash the bricked r9mm receiver with ST-LINK, I had to connect it to the following pads accordingly GND, DIO, CLK and 3v3

The soldering process was relatively simple, with the exception of the CLK pad that was almost inaccessible to the soldering tip due to the placement of the elements on the PCB.
If the soldering doesn’t work for you, feel free to create a connector similar to the one on the photo below, we were flashing the ESCs this way in the early multi-copter days 🙂
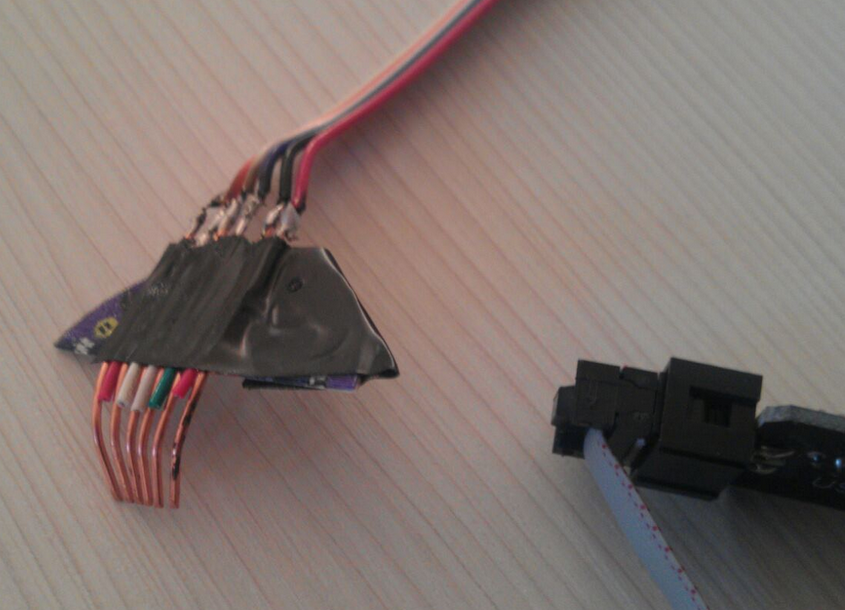
After connecting the pads I have inserted the ST-LINK into the USB and powered the receiver and the red led lit up.
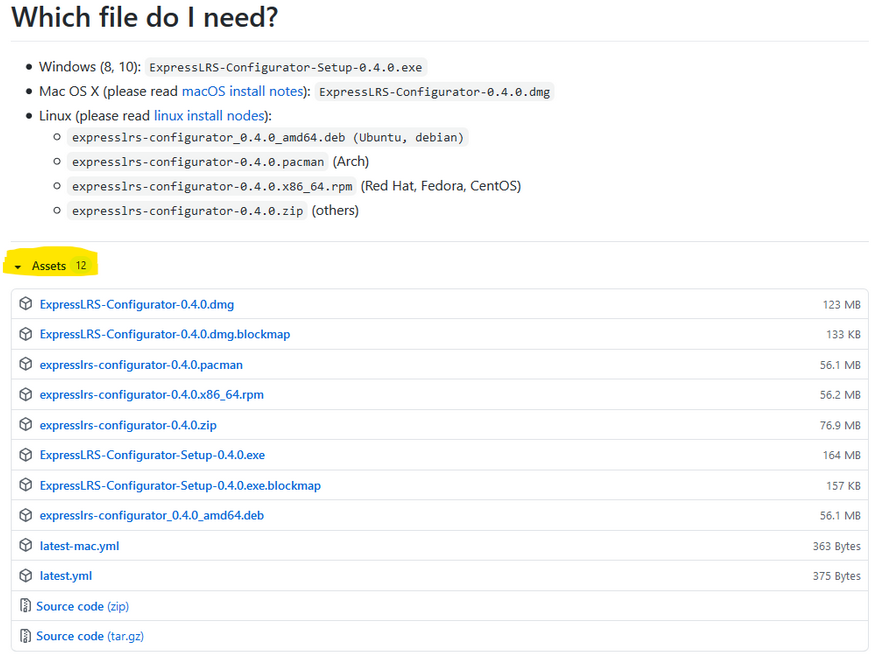
The next part of the flashing process is either to compile the firmware from the source or use the ExpressLRS configurator here. If you are not seeing the downloadables you will need to click on Assets down below each release.
If you want to learn how to use the ExpressLRS configurator in detail, please check the video by Mark Spatz (UAV Tech) below, excellent resource as always:
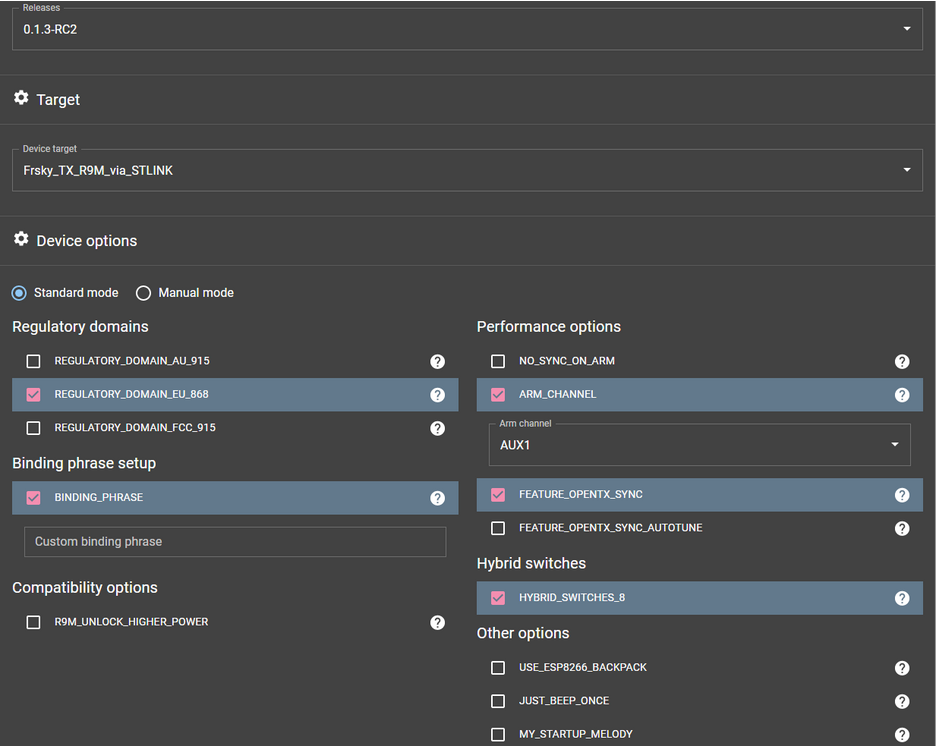
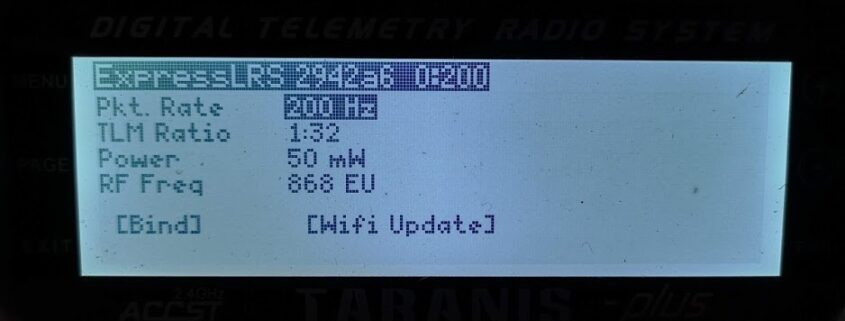
If you are in a hurry here is a screenshot of my settings:
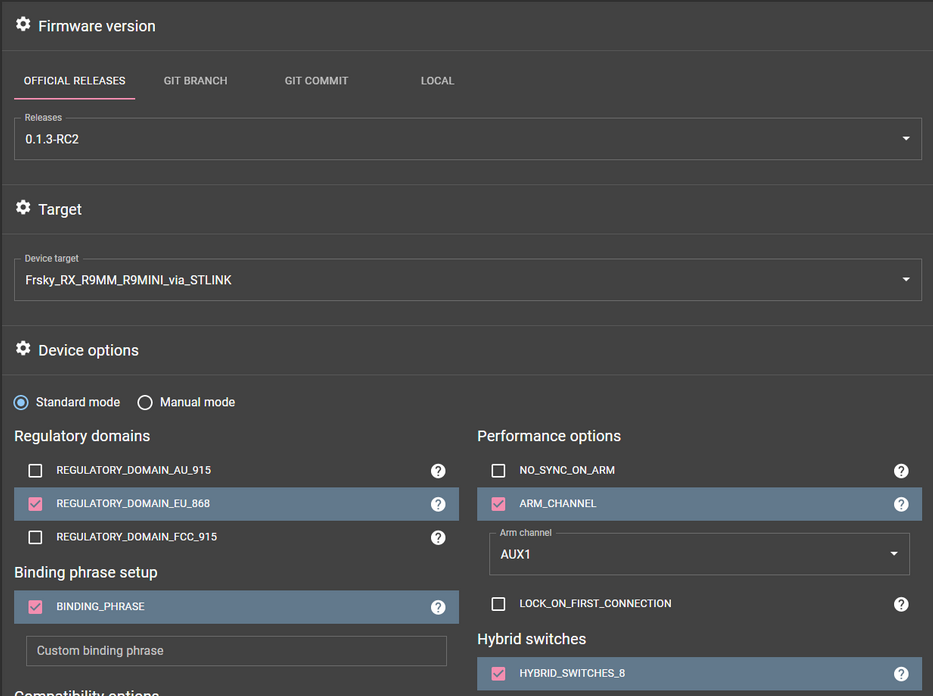
Things to consider:
- Regulatory domains depending on where do you live,
- The binding phrase, important to have the same phrase for the receiver and transmitter module
- No Sync on Arm, disabled in my case since I’m not a racer
- Your arming channel
- Hybrid switches, if you need to use three position switches
After setting everything up, and pressing the Build & Flash button I have waited for the whole process to finish, the configurator displayed that the flashing was successful and the red led on the receiver started flashing.
Flashing the R9M module
I was excited to learn that in ExpressLRS that the flashing means that the receiver is ready for binding 🙂
But now I had no way to test except flashing the R9M transmitter module, so I have quickly swapped the ST-Link wires soldering them on the R9M module. In this case, I have only soldered the wires onto the DIO and CLK pads and powered the module by connecting jumper cables to the 5V and GND pins on the module and ST-Link programmer accordingly. Please note that you have to connect the 5V pin and not the 3V one on the programmer.
I have set the configurator as following:
After building and flashing the R9M transmitter module I was greeted with the ExpressLRS startup tones, so everything was good so far.
This is the way I have preferred to flash it since I already have had the ST-Link at hand, but it is much easier to flash it by using this method with one difference that after flashing the bootloader you don’t need to go through the tedious Visual Studio compiling process rather than use the ExpressLRS configurator and select the Frsky_TX_R9M_via_stock_BL option.
Configuring the Taranis
Next up I needed to update the Taranis firmware and add the ELRS Lua script that enables you to configure the ExpressLRS link settings.
There is a custom version of the OpenTX firmware which unlocks the 500hz update rate on CRSF serial output. It also has some improvements that improve RC packet jitter.
The firmware binaries are available here
After flashing the custom firmware, I have entered my model setup and chosen CRSF protocol for the External RF, and disabled the ADC filter.
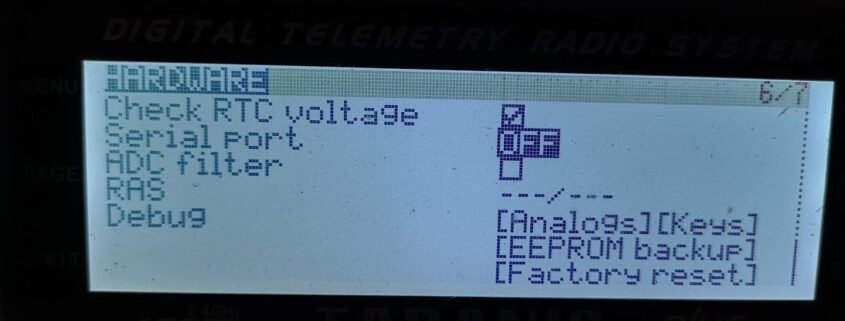
The ExpressLRS wiki suggests setting the Serial Baud Rate to either 400000 or 115200, which was not available on my remote. This caused a problem later on.
What this meant was that my remote was stuck on 400000 and could not communicate reliably with the 2018 R9M module. The module was starting to beep after 5-10 minutes of usage and the link quality would degrade gradually. I have found that the module was heating up and that when I was cooling it everything was going back to normal.
This is why the ExpressLRS wiki suggests doing the Inverter Mod for R9M 2018.
After doing the mod the module stopped beeping even if the remote when powered for a prolonged period, but seeing that the ExpressLRS is a bit sensitive to overheating and wanting to be on the safe side, I have decided to do the fan mod also.

Next, I have downloaded the ELRS Lua script and placed it in the Scripts/Telemetry folder on the Taranis SD card.
After that, I have added it on the third telemetry screen so it is easily available when pressing and holding the Page button to enter the telemetry screens and after that normal press on Page switches between them.
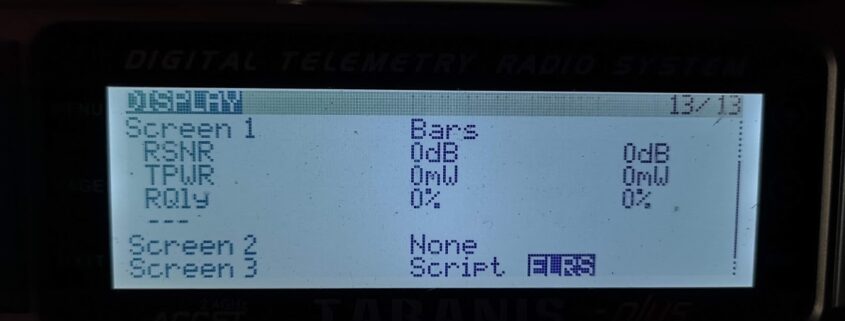
The Lua script enables you to packet rate, telemetry rate, and transmitter module power.
The script provides information about the packet rate (bad UART packets : total packets in second). For example, when you start the script with default settings this number is usually 0:200 which means that the packet rate is 200 per second and there are no bad packets. This value usually matches the selected packet rate in Hz
The packet rate defines the latency of the link, so having it on 200Hz is faster than Crossfire. As I understand the usual usage is 200Hz for Racing and Freestyle and 50Hz for long-range flights.
Flight Controller configuration
I have managed to test ExpressLRS both on Betaflight and FalcoX
For the Betaflight setup, I followed the instructions on the ExpressLRS wiki page and everything worked just fine.
Please note that the three-position switches will only work if you have enabled them in the ExpressLRS configurator before compiling the firmware.
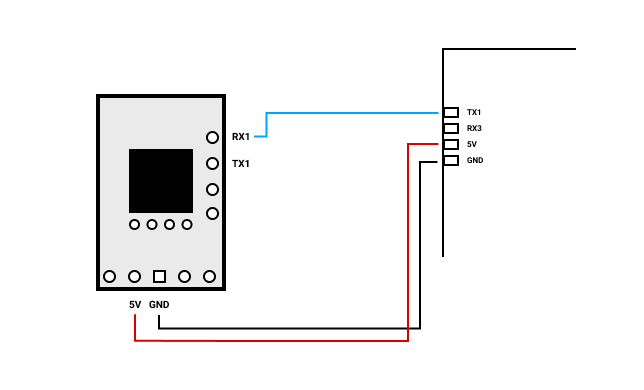
The FalcoX configuration was even easier since it auto-configures itself, you just need to have you just need to connect the r9mm RX pad to the RevoltOSD TX1 pad similar to Crossfire.
In order to reinitialize the RC Wizard on FalcoX, I have connected it to a PC and from the console, in the FalcoX configurator I have entered RESET_WIZARD RADIO
Here is a link to all FalcoX “CMDLETS”, if you need to do a different reset. These are actually commands available for the FalcoX configurator console.
In order to get the link quality reading in the OSD on FalcoX, you will need to provide it on channel 8. The way to set this in Taranis is very similar to setting RSSI reading with one difference that in the inputs page for channel 8 you should select RQLY value from the telemetry and scale it to 100%.
There is a new FalcoX version already that supports Crossfire telemetry, meaning that you will be able to connect r9mm in a similar manner as on Betaflight by using both RX and TX pads and connecting them to the corresponding TX1 and RX1, and using a full-duplex connection on one UART. I will test this version and update this post with the results.
That was all, tedious process but well worth it.
So far I have done only one flight session (4 lipo packs) with the “bricked” receiver (200HZ / 1:32 / 50mW) on FalcoX and it worked flawlessly
DVR from FlyWoo Hexplorer 50mW 50Hz. Stable link lowest LQ = 96 except when I was turning around and the antennas got in a perpendicular position. I had to bail out before the 2km mark since the video signal started glitching.
No luck with the FalcoX the video out VTX wire got snipped so I will have to record it some other day.


Leave a Reply
Want to join the discussion?Feel free to contribute!